

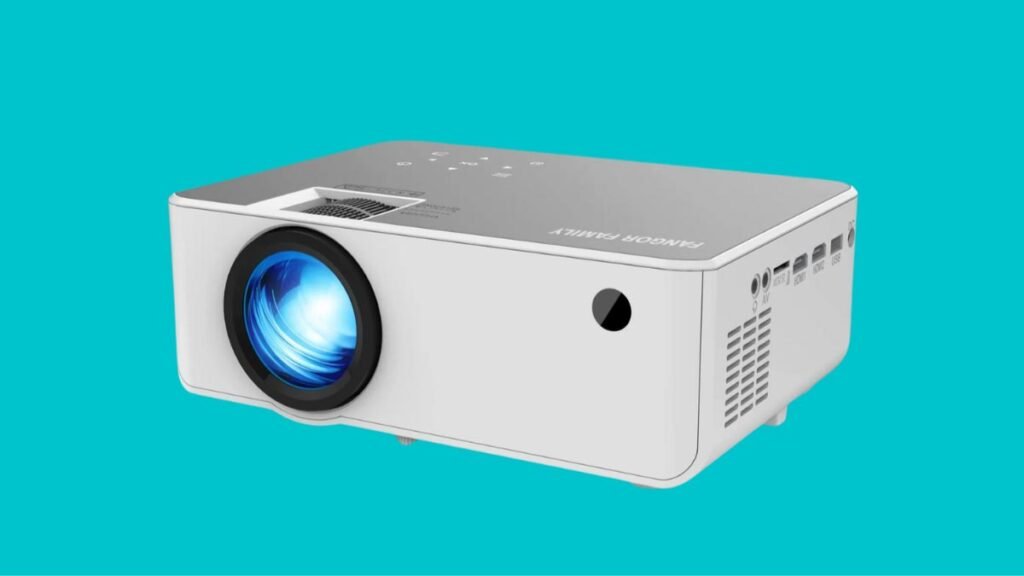
Fangor Projektörünü Dizüstü Bilgisayara nasıl bağlayacağınız konusunda bir çözümünüz var mı?? Dizüstü bilgisayarınızın ekranını bir oda dolusu insana nasıl göstereceğinizi öğrenmek istiyorsanız? Kuyu, Fangor projektörünüz varsa iyi şanslar. Fangor Projektörünüz ile dizüstü bilgisayarınız arasında kolayca bağlantı kurabilirsiniz.. Bunu yalnızca DVI kullanarak yapabilirsiniz, HDMI, VGA kablosu, veya Bluetooth (her iki cihazınız tarafından da destekleniyorsa). Bu yüzden, başlayalım……
Bangor Projektörünü Dizüstü Bilgisayara Bağlayın
Bağlanmak için Bangor Projektörü Dizüstü Bilgisayara veya dizüstü bilgisayarınız ile Projektörünüz arasında bağlantı kurmak için, bu yöntemleri veya süreçleri takip etmelisiniz:
Yöntem # 1 Windows'ta Kablo Kullanma 10
Bu yöntem için üç adımı izlemeniz gerekir
1. İlk önce, kabloyu her iki cihazınızda da bulunan bağlantı noktasına takmanız gerekir. projektör ve dizüstü bilgisayarın. Kabloyu tanımladıktan veya doğruladıktan sonra (HDMI, DVI, veya VGA), iki bağlantı noktasını bağlayabilirsiniz. Bir dizi video bağlantı bağlantı noktası etiketlenmiş olabilir; ancak bağlantı noktaları etiketlenmemişse, kablonun şeklini görmeniz gerekiyor ve ardından onu tam olarak görünen bir bağlantı noktasına takacaksınız.. Dizüstü bilgisayarınızdaki en yaygın çıkış kaynağının VGA bağlantı noktaları olduğunu unutmayın. Bu tür portlar, her biri beşer delikli üç sıradan oluşan veya bu sıralardan oluşan portlara benzerler.. Bu yüzden, dizüstü bilgisayar VGA bağlantı noktasını desteklemiyorsa, bu, bir HDMI bağlantı noktası bulundurması gerektiği anlamına gelir. Bir dizüstü bilgisayarda ikisi de yoksa, bu durumda kullanıcının bir VGA veya HDMI adaptörü satın alması gerekebilir. Miracast bazı Windows bilgisayarları tarafından desteklenir, Fangor projektörü de bu özelliği destekliyorsa, bu, herhangi bir kablo türüne ihtiyaç duymayacağınız anlamına gelir. Windows dizüstü bilgisayarınızın Miracast'ı destekleyip desteklemediğini öğrenmek için, Connect uygulamasını aramanız ve açmanız gerekir.
2. Bundan sonra projektörünüzü açmalısınız (ve dizüstü bilgisayar, Eğer gerekirse). Devam etmek için hem projektörünüzün hem de dizüstü bilgisayarınızın açık olması gerekir.
3. Şimdi, ⊞ Win+P tuşlarına basmalı ve ardından bir paylaşım seçeneği seçmelisiniz. Eğer bunu yapmak zorundaysan, monitörünüzde, monitörünüzde bir ekran paylaşım seçenekleri listesi oluşacaktır:
PC Ekranı Sadece: Bu Yalnızca PC Ekranı seçeneği projeksiyon ekranınızı kapatacaktır; bu, dizüstü bilgisayarınızın ekranının paylaşılmayacağı anlamına gelir.
Kopyalamak: Ekrandan projektörünüze kadar her şeyi paylaşabilirsiniz, ancak projektörünüzdeki görüntüyü dizüstü bilgisayarınızın ekranında tam olarak görebileceksiniz.
Uzatmak: Kapsam seçeneği projektörünüze dizüstü bilgisayarınızın ekranının bir uzantısı gibi davranacak ve size daha fazla alan sunacaktır.; paylaşmanız gereken her şey için, dizüstü bilgisayarınızın ekranından projeksiyon alanına sürüklemeniz yeterli olacaktır.
Yalnızca ikinci ekran: Ekrandan projektöre kadar her şeyi paylaşabilirsiniz, ancak dizüstü bilgisayarınızın ekranında hiçbir şey göremeyeceksiniz.
Yöntem # 2 Bluetooth'u Windows ile kullanma 10
Bu yöntem için, aşağıda belirtilen dört adımı izlemelisiniz:
1. Öncelikle, senin açman lazım
projektör (ve dizüstü bilgisayarın, Eğer gerekirse). Burada, devam etmek için Projektörünüzün ve dizüstü bilgisayarınızın ekranını da açmanız gerekecektir..
2. Daha sonra, projektörünüzü Eşleştirme Moduna ayarlamanız gerekir. Normalde, projektöre bir düğme yerleştirildi (veya projy ile birlikte gelen bir uzaktan kumanda mevcut) bu düğme Bluetooth'u açacak ve keşfedilebilir ve eşleştirilebilir hale getirecek, ancak daha fazla ayrıntı için Projektörünüzün kullanım kılavuzuna bakacağız..
3. daha sonrasında, projeye dizüstü bilgisayarınızdan bağlanmanız gerekir. Genellikle, görev çubuğundaki Bluetooth bağlantı merkezine erişebileceksiniz ve ardından projektörünüze bağlanmayı seçmeniz gerekecek.
Projektörünüzle ilk kez eşleştirirken, bir numarayı doğrulamanız veya onaylamanız istenebilir’ seri veya şifre.
4. ⊞ Win+P tuşlarına basmanız gerekir. Monitörünüzde bir ekran paylaşım seçenekleri listesi oluşacaktır:
Bir seçenek olacak “Yalnızca PC Ekranı”, dizüstü bilgisayarınızın ekranı paylaşılmaması için projeksiyon ekranınızı kapatacaktır.
Diğer seçenek ise “Kopyalamak”, ekranınızdan projektörünüze kadar her şeyi paylaşabileceğiniz anlamına gelir, ancak aynı görüntüyü projektörünüzde ve dizüstü bilgisayarınızın ekranında görebileceğinizi unutmayın..
Üçüncüsü “Uzatmak” seçenek. Bu seçenek projektörünüze dizüstü bilgisayarınızın ekranının bir uzantısı gibi davranacak ve size daha fazla alan sunacaktır.; paylaşmanız gereken her şey için, dizüstü bilgisayarınızın ekranından projeksiyon alanını sürüklemeniz gerekecek.
Bir diğeri “Yalnızca ikinci ekran”, ekrandan projektörünüze kadar her şeyi paylaşabilirsiniz, ancak dizüstü bilgisayarınızın ekranında hiçbir şey göremeyeceksiniz.
Yöntem # 3 Mac’te Kabloları Kullanma
Bu üçüncü yöntem için, aşağıda belirtilen adımları izlemelisiniz:
1. Öncelikle, kabloyu hem projektörünüzdeki hem de Mac'inizdeki bağlantı noktasına takmanız gerekir. Kablo tipini tanımladığınızda (HDMI, DVI, veya VGA), ikisini bağlayabilirsiniz. Bazı video bağlantı bağlantı noktaları etiketlenecektir; ancak bunlar etiketlenmemişse, Daha sonra, kablonun şekline bakmalı ve onu aynı görünen bir bağlantı noktasına takmayı denemelisiniz.
Bir dizüstü bilgisayardaki çıkışın ortak kaynağı VGA bağlantı noktalarıdır. Bu bağlantı noktaları, her biri beşer delikli üç sıradan oluşan bağlantı noktalarına benziyor. Dizüstü bilgisayarınızda bir VGA bağlantı noktası bulunuyorsa, o zaman bir HDMI bağlantı noktasına sahip olması gerekir. Dizüstü bilgisayarınızda bağlantı noktası yoksa, bu, bir VGA veya HDMI adaptörü satın almanız gerekebileceği anlamına gelir.
Mac'inizde bağlantı noktası yoksa, daha sonra Thunderbolt bağlantı noktasına takılan HDMI veya VGA için bir adaptör alabilirsiniz.
2. Şimdi, Apple Logosuna tıklamanız gerekiyor. Bu logoyu, ekranınızın üst kısmında yatay olarak uzanan menünün sol tarafında bulabilirsiniz.. Mac dizüstü bilgisayar ekranını otomatik olarak algılayıp projektöre yansıtıyorsa, o zaman bu yönteme devam etmenize gerek yok.
3. daha sonrasında, Sistem Tercihlerini tıklamanız gerekir. Normalde menüdeki ikinci veya üçüncü listedir.
4. O zaman Ekranlara tıklamanız gerekir. Normalde ekranınızın bir simgesinin yanındaki ikinci simge satırındadır.
5. Şimdi, Düzenleme sekmesine tıklamanız gerekir. Bunu pencerenizin üst kısmında Genel'in yanında göreceksiniz., ve Renk.
Ana hatlarıyla belirtilen görüntü ekranlarınızı sürükleyip bırakabilir veya yanındaki kutuyu işaretlemek için tıklayabilirsiniz. “Ayna Ekranları” hem projektörünüzde hem de dizüstü bilgisayarınızda tam olarak görüntülemek için.
SSS
Dizüstü Bilgisayarınız Neden Projektörünüze Bağlanmıyor??
Eğer olduysa, projektörden dizüstü bilgisayara giden bağlantı kablosunun daha güvenli veya güvenli olup olmadığını kontrol etmeniz gerekir. Harici monitörü bağlayan kabloyu da değiştirmeyi deneyebilirsiniz. Değiştirdiğiniz yeni kablo düzgün çalışıyorsa, bu, hatanın önceki kablonuzda olduğu anlamına gelir. Projektöre basmanız ve ardından, kullanacağınız bağlantı portunu seçmelisiniz.
Dizüstü Bilgisayarı HDMI Olmadan Projektöre Bağlama?
Bluetooth seçeneği, dizüstü bilgisayarınızı projektörünüze kablo kullanmadan bağlamak için başka bir en iyi seçenektir. Projektörünüz ve dizüstü bilgisayarınız Bluetooth seçeneğiyle donatılmış veya mevcut olmalıdır, ve ardından her iki cihazınız da yalnızca birkaç saniye içinde eşleştirilebilir ve bağlanabilir.
Çözüm
Fangor Projektörünü Dizüstü Bilgisayara bağlama konusunda endişeleniyorsanız endişelenmeyin, Bu makale sadece senin için. Burada sizin için kolay çözümler mevcut. Umutla, bu makale sorununuzu çözmenize çok yardımcı olacaktır.


